Please share!
Y’all know how much I love discovering new iPad apps to share. Well, I have a brand new one to share today that will make history even more fun to learn!
Timeline Builder for iPad is another great app from Knowledge Quest.

TimelineBuilder for iPad is an intuitive app that will allow you to create your very own custom timelines. If you’re anything like me, you intend to create a wall or notebook timeline to display all of those historical figures and events you’re kids are learning about, but just never get around to it. This is the perfect way to easily develop that timeline, and it’s so simple to use, your 11 year old can do it! Actually, my 11 year old can do it. Your kids as young as 8 could probably do it if they are savvy with the iPad at all.
Let me show you how it works.
Here is a screen shot of the home screen. A simple tap of the buttons at the bottom will guide through the creation of your own timeline.
Here is a screen shot of the home screen. A simple tap of the buttons at the bottom will guide through the creation of your own timeline.

“About this App” does exactly what you would think — it steps you through creating your timeline. It’s an easy 3-step process. Ben and I created a “Chains of Christianity” timeline for our Principle Approach learning focus this year. Here’s how we did it:
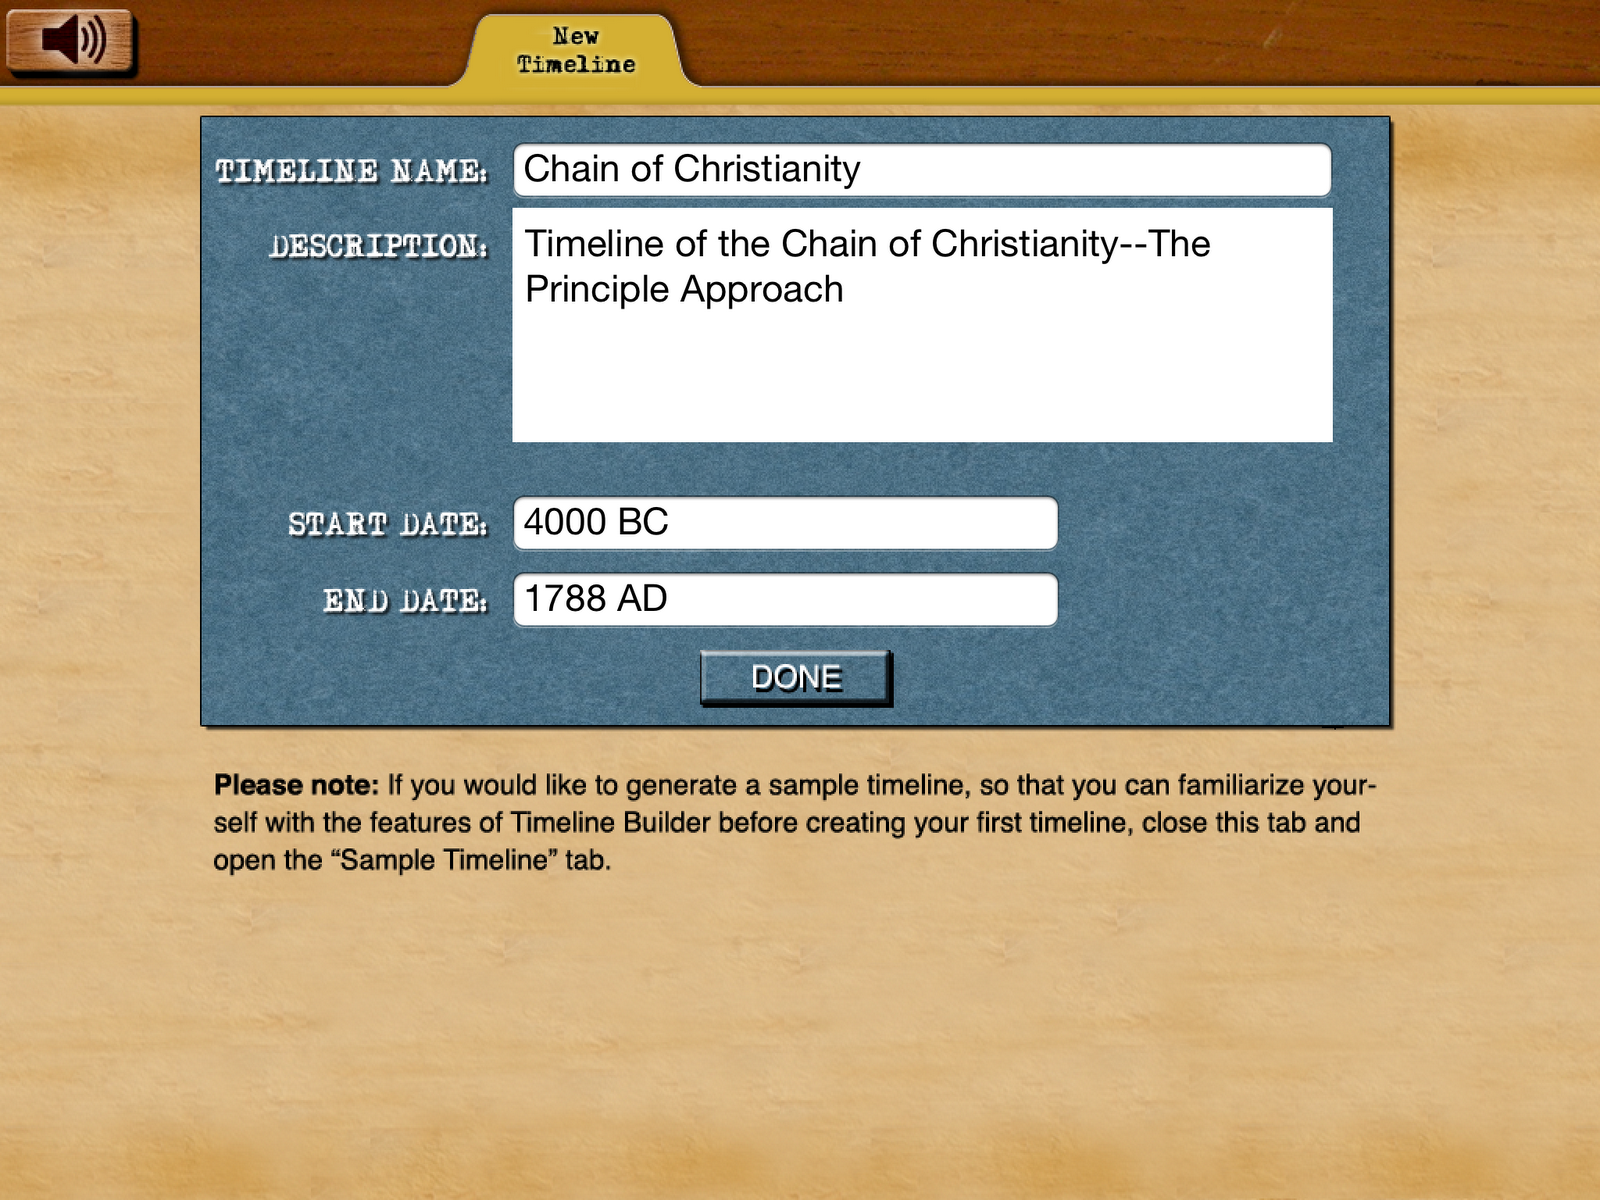
First, we tapped the “New Timeline” folder to begin setting up the timeline. Just enter the information about your timeline and tap “done.” You have created your first timeline.
Now it’s time for the next step — adding your entries, including name, description and dates. You do have to enter start and end dates, even if they are the same. You can enter anything you wish into the description, you are completely in control of the content. If there is a limit to the word count, I didn’t exceed it.
The third step is adding a photo to your event. You can add a photo from your iPad image library. If you don’t have anything appropriate already in your album, just tap the “search Wikipedia” button and find one that will work. Actually, you can search anywhere on the internet if you wish. Once you’ve found your photo, just save it to your photo library or the pasteboard and then upload from there. Click done and you’re finished!
Here is our entry for the time period during which the Bible became available in English — the Dark Ages:

Your timeline will automatically be saved and you can now continue adding more entries by tapping the “new event” tab. You can also edit you entries, including changing out the photo, anytime.
Here’s what our final timeline looks like:
Here’s what our final timeline looks like:

When you tap twice on an entry, it will bring up the photo and the description you entered:

There are a few more options once you are finished. You can save your timeline as a photo, you can save individual events to your photos, you can send either the timeline or the events in an email (and then print it and stick it on a wall–instant wall timeline!), or you can save your timeline or events to a folder for file sharing in iTunes.

I can think of tons of uses for this app — history, geography, science, geneology — any subject where you are studying dates in history. Ben and I are already working on a timeline of our family. And he’s begun one for World War II. It’s super fun to use and doesn’t involve scissors, glue, or wall space that I don’t have — that’s a huge plus for me!
Now for a couple of slight issues to point out. There is music playing in the background while you build and view your timeline. Ben didn’t care much for the music; he thought it should be softer, more classical. Of course, this was easily remedied by turning off the volume. The other issue was that I had to be very careful where I tapped while building the timeline. Several times I was almost finished and then accidentally tapped outside the entry box, causing the box to close and my entry to be lost. If you’re easily distracted (like me AND Ben), this can be frustrating. It would also be nice if you didn’t have to enter a start and end date for entries where these are the same (birthdays, for example). And a little check box for BC and AD would be fabulous. Nothing here that would deter me from buying this app, just some thoughts to make this awesome app even better.
Now for a couple of slight issues to point out. There is music playing in the background while you build and view your timeline. Ben didn’t care much for the music; he thought it should be softer, more classical. Of course, this was easily remedied by turning off the volume. The other issue was that I had to be very careful where I tapped while building the timeline. Several times I was almost finished and then accidentally tapped outside the entry box, causing the box to close and my entry to be lost. If you’re easily distracted (like me AND Ben), this can be frustrating. It would also be nice if you didn’t have to enter a start and end date for entries where these are the same (birthdays, for example). And a little check box for BC and AD would be fabulous. Nothing here that would deter me from buying this app, just some thoughts to make this awesome app even better.
Timeline Builder is available on the Appstore for an introductory price of $4.99. And here’s a great deal for you. If you buy it, try it, and then write a review on iTunes, you can get a Timeline Notebook for free (a $20 value). This would be great for archiving those printed timelines! You can find more information about that here, on Terri’s Take.
Happy AppSchooling!

Don’t miss a thing! Subscribe to Ben and Me and get our articles right to your inbox!

Please share!
