Please share!
I have a confession to make. While I love creating things, we don’t do a lot of arts and crafts in our homeschool. I enjoy painting, drawing, and crocheting especially, but I’m sorry to say that I don’t do a lot of these activities with Ben. We are working to remedy this though.
Okay, now that I have that off of my chest, I do want to share a super simple way you can make homemade Christmas ornaments with your kids that they will love! This is much different than the quilted ornaments I told you about the other day. These are easy enough for your littles to do! Ben loves making them, and so do I.
Many of them adorn our Christmas tree and every year, and they are the first ones that Ben goes searching for when we begin to decorate.

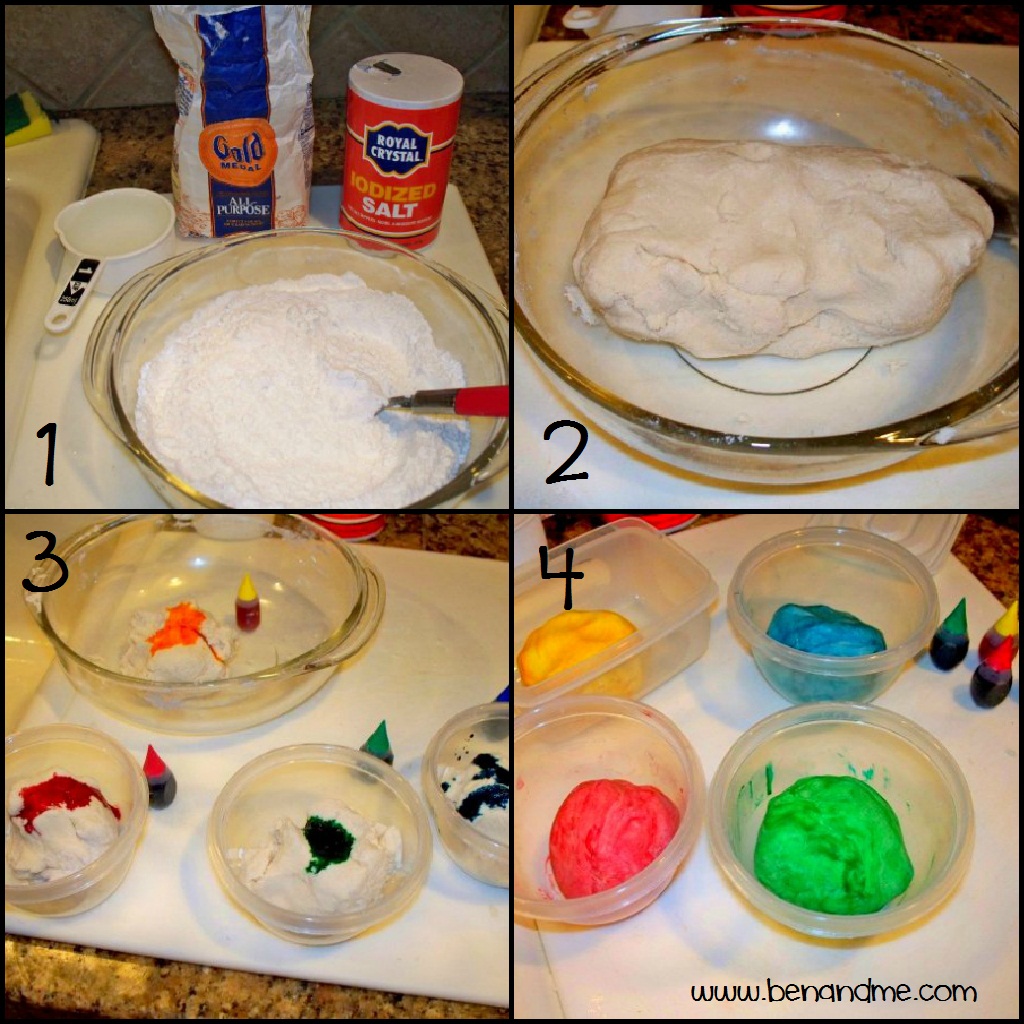
Making the Dough
1. Mix 2 cups flour, 1 cup salt, 1 cup water until a ball forms.
2. Knead until it’s smooth, it should not stick to your fingers. If it does, add a little more flour.
3. Divide the dough, depending on how many colors you plan to have. You can leave the dough it’s natural color and then paint your ornaments with acrylic paint, but we like to dye the dough with food coloring. If you’re going to make more than 4 colors, you might want to double the recipe.
4. Mix the dough and food coloring until the color is distributed throughout. Add more to deepen the color if you wish. Your hands will get very messy, but it’s so worth it! You can make the dough ahead of time and store it in an air-tight container until you are ready to use it.
This recipe will make approximately 10 ornaments.
Making the Ornaments
Now that you’ve made the dough, it’s time to dig in and have fun! Gather a few supplies to help:
- Wax paper or aluminum foil to cover your work surface.
- Cookie cutters, rolling pin, toothpicks for decorating, ribbon, and a straw to make a hole for a ribbon
- Your dough
- Optional: Clear acrylic spray
- Optional: essential oils
- Kids
Your kids will have a great time rolling out the dough to 1/4 inch thickness, and cutting out their ornaments. The toothpicks can be used to prick decorative holes or lines in the ornaments. Different colors can be mixed to create more dimension.
Once your kids are finished creating, don’t forget to make a ribbon hole with the straw, and then place on a cookie sheet and bake at 250 until dry (3-6 hours, depending on the thickness). Ours took about 3 hours. Once they cool down, seal with the acrylic spray, if desired, and after that dries, place a ribbon through the hole you made with the straw and tie it off. For extra fun, add 1-2 drops of either this Winter Spice or Candy Cane scented essential oils to each ornament and allow it to soak in before sealing. Be careful with younger children, not to allow the undiluted oil to get on their skin. If it does, add some oil (coconut or olive oil works well) and wipe off.
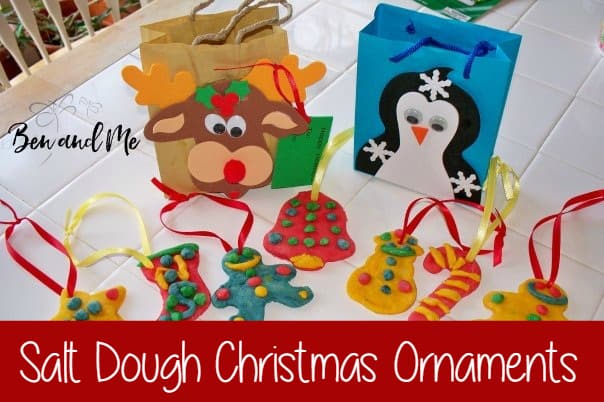
You now have beautiful Christmas ornaments that will last forever! You can use a permanent marker and have your kids sign and date their art on the back of each piece.
Hang them on your Christmas tree or give as a gift to a friend. Grandparents really love these, too. You can also place them on your wrapped Christmas gifts for a little extra special touch. You could even make small circles out of the leftover dough to make gift tags.
Fun, right?
What fun holiday crafts are you making with your kids this year?


Please share!
